Scrapy框架的使用-Scrapy通用爬虫
CrawlSpider
1 | 在实现通用爬虫之前,我们需要先了解一下 CrawlSpider, 其官方文档链接为: http://scrapy.readthedocs.io/en/latest/topics/spiders.html#crawlspider |
1 | CrawlSpider继承自Spider类。除了Spider类的所有方法和属性,它还提供了一个非常重要的属性和方法。 |
Rule
1 | 这里最重要的内容莫过于Rule的定义了,它的定义和参数如下所示: |
1 | □ link_extractor:是Link Extractor对象。通过它, Spider可以知道从爬取的页面中提取哪些链接。提取出的链接会自动生成Requesto它又是一个数据结构,一般常用 LxmlLinkExtractor对象作为参数,其定义和参数如下所示: |
1 | □ callback:即回调函数,和之前定义Request的callback有相同的意义。每 link_extractor中获取到链接时,该函数将会调用。该回调函数接收一个response作为其第一个参城,并返回一个包含Item或Request对象的列表。注意,避免使用parse()作为回调函数。由于CrawlSpider使用parse()方法来实现其逻辑,如果parse()方法覆盖了,CrawlSpider将会运行失败。 |
1 | 以上内容便是CrawlSpider中的核心Rule的基本用法 。但这些内容可能还不足以完成一个CrawlSpider爬虫。下面我们利用CrawlSpider实现新闻网站的爬取实例,来更好地理解Rule的用法 |
Item Loader
1 | 我们了解了利用CrawlSpider的Rule来定义页面的爬取逻辑,这是可配置化的一部分内容。但是,Rule并没有对Item的提取方式做规则定义。对于Item的提取,我们需要借助另一个模块Item Loader来实现。 |
1 | 我们了解了利用CrawlSpider的 Rule来定义页面的爬取逻辑,这是可配置化的一部分内容 但是Rule并没有对Item的提取方式做规则定义。对于Item的提取,我们需要借助另一个模块Item Loader来实现。 |
1 | Item Loader的 API如下所示: |
1 | 下面将依次说明Item Loader的API参数。 |
1 | To use an Item Loader, you must first instantiate it. You can either instantiate it with an item object or without one, in which case an item object is automatically created in the Item Loader __init__ method using the item class specified in the ItemLoader.default_item_class attribute. |
实例
1 | 一个比较典型的Item Loader实例如下所示: |
1 | 这里首先声明一个Product Item ,用该Item和Response对象实例化ItemLoader,调用add_xpath()方法把来自两个不同位置的数据提取出来,分配给name属性,再用add_xpath()、add_css()、add_value()等方法对不同属性依次赋值,最后调用load_item()方法实现Item 的解析。 |
Input Processor和Output Processor
1 | 另外, Item Loader每个字段中都包含了一个Input Processor ( 输入处理器)和一个 Output Processor(输出处理器) |
1 | An Item Loader contains one input processor and one output processor for each (item) field. The input processor processes the extracted data as soon as it’s received (through the add_xpath(), add_css() or add_value() methods) and the result of the input processor is collected and kept inside the ItemLoader. After collecting all data, the ItemLoader.load_item() method is called to populate and get the populated item object. That’s when the output processor is called with the data previously collected (and processed using the input processor). The result of the output processor is the final value that gets assigned to the item. |
例子解释说明
1 | l = ItemLoader(Product(), some_selector) |
1 | Data from xpath1 is extracted, and passed through the input processor of the name field. The result of the input processor is collected and kept in the Item Loader (but not yet assigned to the item). |
1 | It’s worth noticing that processors are just callable objects, which are called with the data to be parsed, and return a parsed value. So you can use any function as input or output processor. The only requirement is that they must accept one (and only one) positional argument, which will be an iterable. |
1 | The other thing you need to keep in mind is that the values returned by input processors are collected internally (in lists) and then passed to output processors to populate the fields. |
内置的Item Loader
1 | Even though you can use any callable function as input and output processors, itemloaders provides some commonly used processors, which are described below. |
Identity
1 | The simplest processor, which doesn’t do anything. It returns the original values unchanged. It doesn’t receive any __init__ method arguments, nor does it accept Loader contexts. |
1 | from itemloaders.processors import Identity |
TakeFirst
Join
1 | Returns the values joined with the separator given in the __init__ method, which defaults to ' '. It doesn’t accept Loader contexts. |
1 | from itemloaders.processors import Join |
Compose
1 | A processor which is constructed from the composition of the given functions. This means that each input value of this processor is passed to the first function, and the result of that function is passed to the second function, and so on, until the last function returns the output value of this processor. |
1 | from itemloaders.processors import Compose |
MapCompose
1 | The input value of this processor is iterated and the first function is applied to each element. The results of these function calls (one for each element) are concatenated to construct a new iterable, which is then used to apply the second function, and so on, until the last function is applied to each value of the list of values collected so far. The output values of the last function are concatenated together to produce the output of this processor. |
1 | def filter_world(x): |
1 | As with the Compose processor, functions can receive Loader contexts, and __init__ method keyword arguments are used as default context values. See Compose processor for more info. |
SelectJmes
Declaring Item Loaders
1 | Item Loaders are declared using a class definition syntax. Here is an example: |
1 | from itemloaders.processors import TakeFirst, MapCompose, Join |
1 | As you can see, input processors are declared using the _in suffix while output processors are declared using the _out suffix. And you can also declare a default input/output processors using the ItemLoader.default_input_processor and ItemLoader.default_output_processor attributes. |
Declaring Input and Output Processors
1 | As seen in the previous section, input and output processors can be declared in the Item Loader definition, and it’s very common to declare input processors this way. However, there is one more place where you can specify the input and output processors to use: in the Item Field metadata. Here is an example: |
1 | import scrapy |
1 | from scrapy.loader import ItemLoader |
1 | The precedence order, for both input and output processors, is as follows: |
ItemLoader Objects
1 | classscrapy.loader.ItemLoader(item=None, selector=None, response=None, parent=None, **context)[source]¶ |
1 | Parameters |
1 | If no item is given, one is instantiated automatically using the class in default_item_class. |
Item
context
1 | The currently active Context of this Item Loader |
default_item_class
default_input_processor
default_output_processor
default_selector_class
selector
1 | The Selector object to extract data from. It’s either the selector given in the __init__ method or one created from the response given in the __init__ method using the default_selector_class. This attribute is meant to be read-only. |
add_css(field_name, css, processors,kw)
1 | Similar to ItemLoader.add_value() but receives a CSS selector instead of a value, which is used to extract a list of unicode strings from the selector associated with this ItemLoader. |
add_value(field_name,value,processors,kw)
add_xpath(field_name, xpath, processors,kw)
get_collected_values(field_name)
get_css(css,processors,kw)
get_output_value(field_name)
get_value(value,processors,kw)
get_xpath(xpath,processors,kw)
项目实战(Scrapy通用爬虫)
1 | 首先新建一个Scrapy项目,名为 scrapyuniversal, 如下所示: |
1 | 运行之后便会生成一个CrawlSpider,其内容如下所示: |
1 | 这次生成的Spider内容多了一个rules属性的定义。Rule的第一个参数是LinkExtractor,就是上文所说的LxmlLinkExtractor,只是名称不同。同时,默认的回调函数也不再是parse,而是 parse_item |
定义Rule
1 | 要实现新闻的爬取,我们需要做的就是定义好Rule,然后实现解析函数。下面我们就来一步步实现这个过程。 |
1 | 这是新闻的列表页,下一步自然就是将列表中的每条新闻详情的链接提取出来。这里直接指定这些链接所在区域即可。查看源代码,所有链接都在ID为left_side 的节点内,具体来说是它内部的 |
1 | 此处我们可以用LinkExtractor的restrict_xp aths属性来指定,之后 Spider就会从这个区域提取所有的超链接并生成Request 但是,每篇文章的导航中可能还有一些其他的超链接标签,我们只想把需要的新闻链接提取出来。真正的新闻链接路径都是以article开头的,我们用一个正则表达式将其匹配出来再赋值给allow参数即可。另外,这些链接对应的页面其实就是对应的新闻详情页,而我们需要解析的就是新闻的详情信息,所以此处还需要指定一个回调函数callback |
1 | 到现在我们就可以构造出一个Rule了,代码如下所示: |
1 | 接下来,我们还要让当前页面实现分页功能,所以还需要提取下一页的链接。分析网页源码之后可以发现下一页链接是在ID 为 pageStyle的节点内 |
1 | 但是,下一页节点和其他分页链接区分度不高,要取出此链接我们可以直接用XPath的文本匹配方式,所以这里我们直接用LinkExtractor的 restrict_xpaths属性来指定提取的链接即可。另外,我们不需要像新闻详情页一样去提取此分页链接对应的页面详情信息,也就是不需要生成Item ,所以不 |
1 | 接着我们运行代码,命令如下所示: |
解析页面
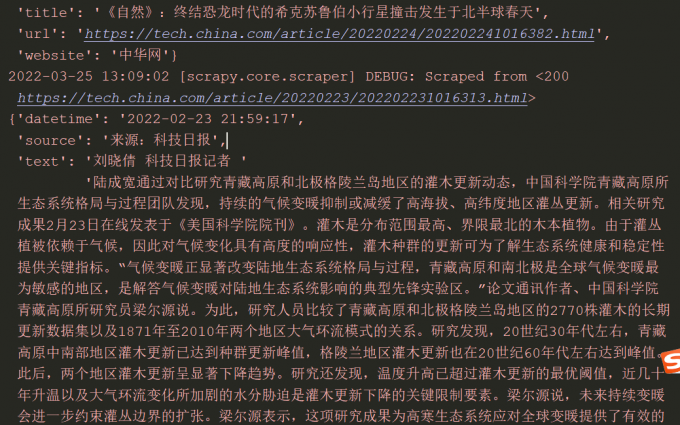
1 | 接下来我们需要做的就是解析页面内容了,将标题、发布时间、正文、来源提取出来即可。首先定义一个Item ,如下所示: |
1 | 这里的字段分别指新闻标题、链接、正文、发布时间、来源、站点名称,其中站点名称直接赋值为中华网。因为既然是通用爬虫,肯定还有很多爬虫也来爬取同样结构的其他站点的新闻内容,所以需要一个字段来区分一下站点名称 |
1 | 如果像之前一样提取内容,就直接调用response变量的xpath()、css()等方法即可 。这里parse_item()方法的实现如下所示: |
使用ItemLoader
1 | 现在我们就可以成功将每条新闻的信息提取出来。 |
1 | def parse_item(self, response): |
1 | ChinaLoader继承了News Loader类,其内定义了一个通用的 Out Processor为TakeFirst,这相当于之前所定义的extrac t_first()方法的功能。我们在ChinaLoader中定义了text_out和source_out字段。这里使用了一个Compose Processor,它有两个参数:第一个参数Join也是一个Processor,它可以把列表拼合成一个字符串;第二个参数是一个匿名函数,可以将字符串的头尾空白字符去掉。经过这一系列处理之后,我们就将列表形式的提取结果转化为去重头尾空白字符的字符串。 |
1 | 代码重新运行,提取效果是完全一样的。 |
通用配置抽取
1 | 为什么现在只做到了半通用化?如果我们需要扩展其他站点,仍然需要创建一个新的CrawlSpider,定义这个站点的Rule,单独实现parse_item()方法还有很多 代码是重复的,如CrawlSpider的变量、方法名几乎都是一样的。那么我们可不可以把多个类似的几个爬虫的代码共用,把完全不相同的地方抽离出来,做成可配置文件呢? |
1 | scrapy genspider -t crawl universal universal |
1 | 第一个字段spider即Spider的名称,在这里是universal。后面是站点的描述,比如站点名称、类型、首页等。随后的settings是该Spider特有的se ttings配置,如果要覆盖全局项目,settings.py内的配置可以单独为其配置。随后是Spider的一些属性,如start_u:rls、allowed_domains、rules等。 |
1 | from scrapy.linkextractors import LinkExtractor |
1 | 这样我们将基本的配置抽取出来。如果要启动爬虫,只需要从该配置文件中读取然后动态加载到Spider中即可。所以我们需要定义一个读取该JSON文件的方法,如下所示: |
1 | 定义了 get_corrfig()方法之后,我们只需要向其传入JSON配置文件的名称即可获取此JSON配置信息。随后我们定义入口文件run.py,把它放在项目根目录下,它的作用是启动Spider,如下所示: |
没有伞的孩子,必须努力奔跑!
Typewriter Mode** 已开启。
可以在视图菜单中关闭
不再显示关闭